Resources
Disease Management

Kidney Biopsy for IgAN: Understanding the Procedure and Its Importance

By 
the PicnicHealth Team

Apr 07, 2023 • 5 min read

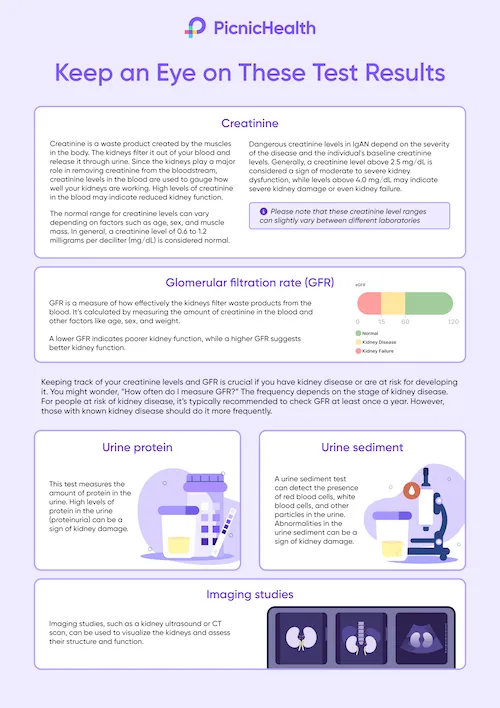
A kidney biopsy is a medical procedure where a small piece of kidney tissue is removed to examine under a microscope. This is done to check for any signs of damage or disease that may be affecting the kidney’s function or causing other health problems. A kidney biopsy can provide important information about kidney function, helping nephrologists (doctors specializing in kidney health) diagnose and treat kidney conditions. Kidney biopsies are sometimes requested to diagnose suspected kidney issues, such as IgA Nephropathy (IgAN), or to develop treatment plans based on the kidney’s current condition. Additionally, kidney biopsies can help determine how quickly a kidney is deteriorating or improving, and monitor the health of a transplanted kidney.

In the US, nearly 175 kidney biopsies are performed per million people each year. Kidney biopsies can reveal important information about kidney function and inform nephrologists about the possible cause of symptoms that brought the patient in for a visit in the first place. Nephrologists also study how the kidneys affect other parts of your body, such as the immune and cardiovascular systems.

Your doctor may recommend a kidney biopsy to:

  • Diagnose kidney issues that cannot otherwise be identified through other means, such as an IgAN diagnosis
  • Develop treatment plans based on the kidney’s current condition
  • Determine how quickly a kidney is deteriorating or improving
  • Monitor the health of a transplanted kidney

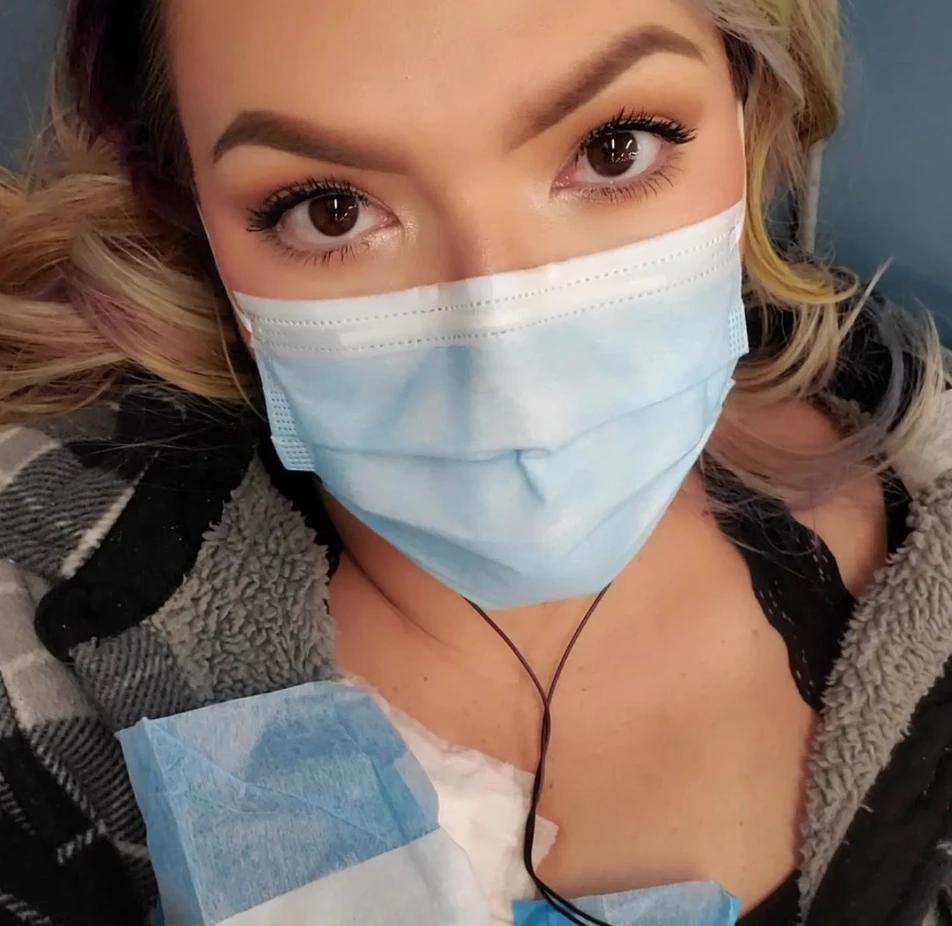
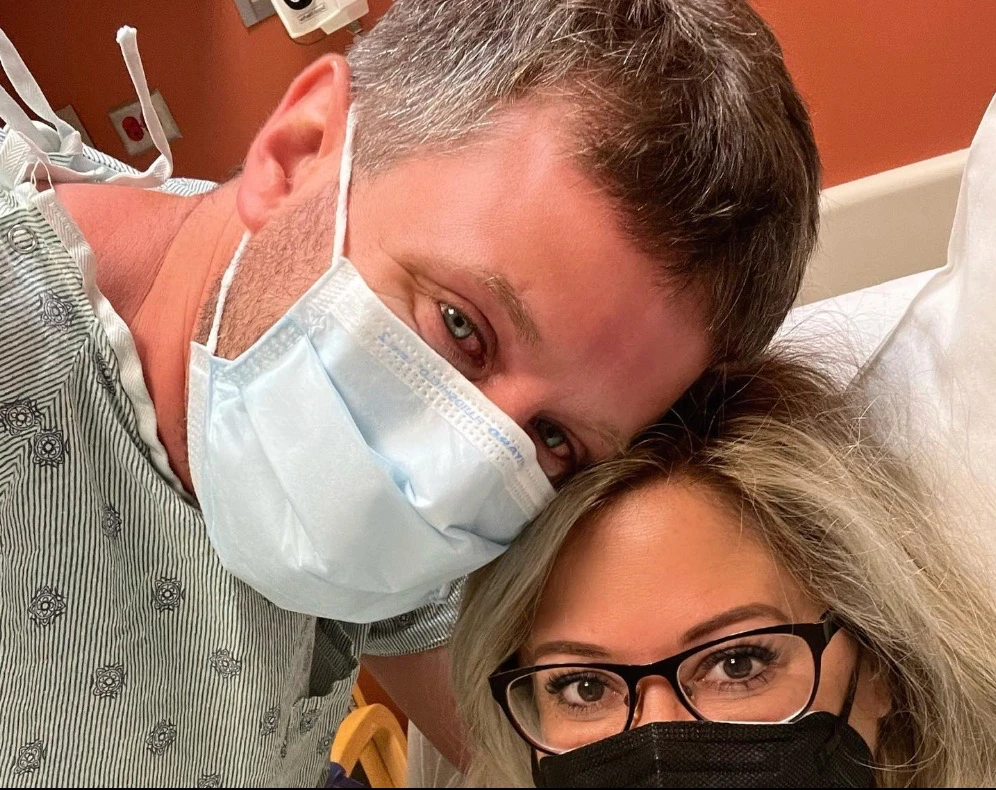
After the procedure, most patients can leave the hospital the same day or around 12 to 24 hours after the procedure. It’s important to rest for another day or two and to ask your care team about any activity restrictions, such as work, heavy lifting, and strenuous exercise. The area where the biopsy was performed may be tender for a few days, but this discomfort is typically mild and easily managed.

What Will A Kidney Biopsy Reveal

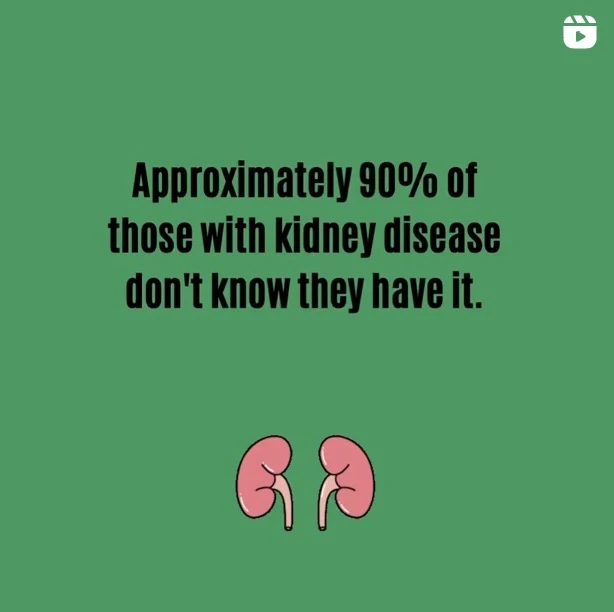
Many patients and families who encounter a renal biopsy wonder, “What will a kidney biopsy reveal?” Generally, a kidney biopsy will reveal scarring, inflammation, and protein deposits that may not be visible in other diagnostic tests, such as ultrasounds, blood, and urine tests. Abnormal biopsy results may indicate unexpected scarring, inflammation, or protein deposits that shouldn’t be there.

An abnormal biopsy result might reveal:

  • Infection
  • Poor blood flow through the kidney
  • Connective tissue disease or other diseases that affect the kidney, such as diabetes
  • Kidney rejection, in the case of a transplanted kidney

After the biopsy has been performed, It may take between three to five days for the results to be available. This is because a specially trained pathologist must read and interpret the biopsy.

Several symptoms may indicate a need for a kidney biopsy. This will be determined by your nephrologist, but generally, these symptoms include:

  • Blood in the urine
  • Protein in the urine
  • Sudden onset kidney disease with no clear cause
  • Nephrotic syndrome and glomerular disease, which happen when the parts of the kidney that filter out toxins are damaged

The first signs of kidney issues usually include blood and protein in the urine, swelling in your hands and feet, and high blood pressure. Kidney biopsies are ordered to confirm suspicions that these symptoms are directly related to the kidney.

The scarring, inflammation, and protein deposits that may be revealed by kidney biopsies can help nephrologists determine:

  • How quickly kidney disease is progressing
  • The extent of the damage from existing kidney disease or other problems that impact the kidney
  • How the current treatment plan for kidney disease is working

The results of a kidney biopsy can be used to diagnose and formulate a treatment plan with the patient if the results call for it.

Kidney Biopsy Preparation

Preparing for a kidney biopsy is an essential step to ensure the procedure goes smoothly and effectively. Before your biopsy, it is important to meet with your physician to discuss the procedure, what to expect, and how to prepare. Be sure to bring a list of all the medications you take, including over-the-counter drugs, vitamins, herbal supplements, or other home remedies.

To minimize the risk of bleeding, it is crucial to stop taking certain medications before the biopsy. These typically include blood thinning medications such as warfarin, rivaroxaban, dabigatran, or enoxaparin, as well as ibuprofen and other nonsteroidal anti-inflammatory drugs.

Your care team will let you know when these medications should be stopped and when they can be continued again. In general, it is recommended to stop these medications at least seven days before the biopsy, although some medical professionals may suggest stopping them up to fourteen days before the procedure. Your care team will also provide instructions on when it is safe to resume taking these medications, typically seven to fourteen days after the procedure.

It is also important not to eat or drink for up to eight hours before the procedure to ensure that your stomach is empty during the procedure. Kidney biopsy anesthesia is usually local, which means you will be receiving numbing medication to the area where the biopsy will be done. This will help to ensure that you do not feel any pain during the procedure. You will be positioned lying down on an exam table, and the biopsy location will depend on whether the kidney is transplanted or not.

If the biopsy is being performed on a native kidney (a kidney in its original position), you will be positioned on your stomach with a pillow placed underneath your rib cage to help expose the kidney. If the biopsy is being performed on a transplanted kidney, you will lie on your back. The doctor will use an ultrasound probe to identify where to insert the needle. The doctor will then mark the skin, disinfect the area, and apply a local anesthetic. They will then make a very small incision where the needle will go in and use the ultrasound probe to guide the needle into the kidney. You may feel a small pinch, pop, or pressure as the sample is collected. The entire procedure, from start to finish, typically lasts about an hour.

After the sample has been collected, the doctor will remove the needle and a bandage over the incision site. It’s common to feel a little soreness or discomfort at the biopsy site, but this should improve in a few days. It’s essential to follow your doctor's instructions regarding recovery, which may include resting for a short time and avoiding strenuous activities for a few days.

While complications are rare, it’s essential to monitor your symptoms after the biopsy. Your doctor will provide you with detailed instructions on what to look out for and when to seek medical attention. For example, if you experience significant pain, swelling, or bleeding from the biopsy site, or if you develop a fever or chills, contact your doctor immediately. By following these guidelines and working closely with your healthcare team, you can minimize your risk of complications and ensure a successful biopsy.

Kidney Biopsy Recovery

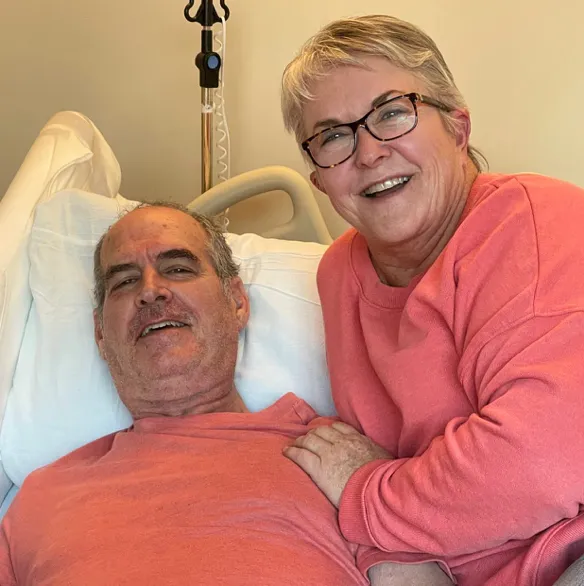
Kidney biopsies are one of the least invasive and most confident methods to diagnose kidney disease and other problems that impact the kidney. Recovery from a kidney biopsy is usually straightforward. Although many patients can leave the hospital the same day of the procedure, it is not uncommon to stay overnight or 12 to 24 hours after the procedure. This is to monitor any issues that may come up such as minor bleeding or tenderness in the area.

It is normal to experience some slight abdominal pain and tenderness for a few days after the procedure. Your care team will inform you of specific restrictions, such as no heavy lifting, driving, or showering for 24 to 48 hours after the biopsy. Specific recovery recommendations may be unique to each case, but, general kidney biopsy aftercare instructions include:

  • Resting for 24 to 48 hours after the procedure, only getting up to use the bathroom
  • Not driving for 24 to 48 hours after the procedure.
  • Avoid showering for 24 hours after the biopsy. If your provider allows, you may gently sponge clean yourself. When showering is possible, do not scrub the site. Gently wash the area and pat it dry.
  • Not removing the bandage until 24 to 48 hours after the biopsy.
  • Avoid lifting anything heavier than 10 pounds for up to four days after the procedure.
  • Consult your doctor for a return to work date. Be sure to make your physician aware if your job involves heavy lifting.
  • Check with your doctor before taking any medications that affect blood clotting, such as aspirin or prescription blood thinners.

While it is common to experience some slight tenderness in the days following a biopsy and have some minor bleeding on the biopsy bandage, severe pain after a kidney biopsy is not normal. If you experience severe pain or any of these other symptoms after your biopsy, you should contact your healthcare provider right away:

  • Bloody urine or feeling unable to urinate
  • Exhaustion or extreme fatigue
  • Lightheadedness or dizziness
  • Struggling to catch your breath
  • Sudden chest pain
  • A fever of 100.4 Fahrenheit or higher
  • Chills
  • Increasing redness, pain, or swelling at the biopsy site
  • Openage, draining, or bleeding from the biopsy site

The rate of serious complications in the case of a kidney biopsy is very low - between 1% and 7%. Your doctor should inform you of the results of your biopsy at your follow-up appointment, usually received within 3 to 5 days of the procedure. However, a partial report may be available in less than 24 hours. Kidney biopsy results can be used to create a treatment plan for the symptoms that resulted in the biopsy in the first place or to stabilize a pre-existing treatment plan. Working with your doctor to create a care plan for recovery as you await the results of your biopsy may be useful in ensuring a smooth recovery.

We know that every person's story is unique and deserves to be heard.

Join our early breast cancer registry to be counted and share your story with research.

Learn More

Create a List

List the names of all the doctors, hospitals, and other facilities your loved one visits regularly, along with those they have visited in the past. Try to go back as far as you can, striving for at least the last 5-10 years, but do your best. Even if you can’t remember them all, having a strong baseline can help you quickly identify gaps in records.

Ensure You Have the Appropriate Legal Status

It is important to make sure that you are fully empowered to make decisions on behalf of your loved one with Alzheimer’s. Your relationship status with the patient may not be enough to legally give you access to your loved one's medical information. It is a good idea to talk to an expert about securing special legal status, such as Power of Attorney (POA), a legal document that allows an individual to name someone as their decision maker should they no longer be able to make decisions on their own.

Gather and Organize the Medical Records in One Place

It’s important to have all of your loved one’s medical records together in one spot. This makes it much easier for you and your loved one’s physicians to accurately map the patient’s medical journey and more easily share information between doctors. Fortunately, tools exist to make record management and access simple. A free resource like PicnicHealth helps you collect and organize all of this information. PicnicHealth’s intuitive timeline allows you to pinpoint data across the medical history, eliminating your need for keeping heavy binders filled with paper records or keeping track of multiple software portal logins.

Review the Medical Records to be an Informed Advocate

The better you understand your loved one's medical history, the better you can advocate on their behalf. Access and understanding of this information will help you to ask informed questions with physicians. Through regular communication backed by the data in the medical records, you can help your loved one’s care team develop a more successful care plan.

Learn more about PicnicHealth’s commitment to the Alzheimer’s community and the Alzheimer’s Association

Learn More

Together, we can make a difference.

Learn more about PicnicHealth’s commitment to the Alzheimer’s community and the Alzheimer’s Association

Learn More

1. Build a support network.

When you’re juggling appointment times and insurance claims, putting a robust support system together might not strike you as the most urgent task. Investing the time to cultivate relationships with people can turn to in times of need will pay dividends. The next time you need a last-minute ride or just someone to listen, you won’t be on your own.

There are many condition-specific support groups and support groups for caregivers generally in person or online. In addition to the encouragement and empathy they provide, support groups can be a helpful source of tips, resources, and recommendations for navigating caregiving.

2. Stay organized.

The backbone of effective caregiving is organization. Keep medical information, appointment schedules, and medication lists in order. Use a planner or a digital service like PicnicHealth to stay on top of your responsibilities. This attention to detail can prevent future complications and reduce day-to-day stress.

3. Explore treatments and clinical trials.

We’ve seen incredible breakthroughs in treatment over the past couple of years, powered by patients and their caregivers participating in research. Stay in the loop about the latest in medical advancements and available resources that could benefit your loved one. Whether it’s a new therapy option or a community service that aids independence, being informed can make a world of difference in the quality of care you provide.

4. Make time for self-care.

It may seem self-centered to focus on self-care—but when you feel good, you can be a better caregiver. Whether it’s exercise, a mindfulness practice, a soak in the bath, or just time to rest when you need it, carve out those moments in the day when you can unwind, reset, and stay healthy mentally and physically. Think of it as building up your reserves of kindness, patience, and understanding—which can only benefit your loved one. No one can pour from an empty cup.

Having trouble managing your loved one's medical records?

Easily manage all of your loved one's medical records and contribute to ongoing Alzheimer's research with PicnicHealth.

Learn More

LC-FAOD Odyssey: A Preliminary Analysis, presented at INFORM 2021

Data from real-world medical records:

(from 13 patients with LC-FAOD)

16 yrs old

Median age at enrollment

38% Female

15 providers / patient

7.5 years of data / patient

Data from patient-reported outcome (PRO) survey

(from 13 patients with LC-FAOD)

We hope you found this session informative! Sign up for PicnicHealth’s Alzheimer’s research program below.

Join Now
Tip: Download or print the poster at the end of this article to review before your next appointment!
However, it's important to consult with a healthcare provider or registered dietitian to determine the appropriate amount of protein for your individual needs. In general, a diet with moderate protein intake (about 0.8 grams per kilogram of body weight per day) is recommended for people with kidney diseases.

Learn more about contributing to IgAN research with PicnicHealth. 

Learn More

Save The Top-10 List

Download this list to save onto your phone or print it out for your fridge!

Download PDF

Keep an Eye on These Test Results

Download this poster to save onto your phone or print it out for your fridge!

Download PDF

Resource Flyer

Explore the essential takeaways from Victoria's Webinar, along with some resources that she shared.

Download PDF

Pre-Appointment Worksheet

Prepare for your loved one's next appointment

Download PDF
A tablet, phone, or laptop with a working camera, microphone, and stable internet connection.
A quiet, distraction-free area with enough space to walk a few steps if applicable.
A chair that you can use during any movements or tasks you’ll be asked to perform.
The tripod mailed to you via Amazon.

What to Expect

Before your video call:

Book Your Assessment
Visit your to-do list on your PicnicHealth Research Dashboard or click the scheduling link sent to your email. Note: Search for “New task for the ORBIT-CIDP Study" to find the video call scheduling link.
Receive Confirmation
Check your email for a confirmation with your scheduled video call time and instructions.

On the day of your video call:

Click on Video Link
Join your personal video call using the link we sent by email, or text message, or find it on your research dashboard.
Meet your nurse
A Registered Nurse (RN) will guide your virtual assessment, which will last about 30 minutes.
Complete the Physical Activity Assessment (INCAT)
The nurse will guide you through questions and, if needed, physical tasks to help researchers gain a deeper understanding of CIDP.
Complete the Movement Assessment (Optional)
If you participate, a nurse will guide you through three short recorded movement activities to complete as best you can:
Chair Task
While seated with your arms crossed over your chest and hands on oppositeshoulders, you’ll be asked to stand up, remain standing for 20 seconds, and then sit back down.
Arm Movement Task
While seated with your arms resting at your sides, you’ll be asked to raise both arms out to the sides until they meet above your head, then lower them back to your lap.
Finger Dexterity Task
While seated, raise your right hand with fingers extended. Touch your thumb to each fingertip in order, then reverse. Repeat with your left hand. This will then be repeated with your left hand.
Earn Compensation

Receive up to $55 for your participation:

  • $25 for completing the Physical Activity Assessment (INCAT).
  • $30 for the Optional Movement Assessment.
Recording: Your research assessment may be recorded to ensure accurate data collection. If you participate in the optional Movement Assessment, it will also be recorded. These recordings may capture your voice and responses, but identifiable information like your face, name, or background will be removed to protect your privacy.
Opt Into the Smart Insole Study Activity
Complete the opt-in survey to confirm your participation.
Receive Your Smart Insoles
Your smart insoles will be shipped to your home via FedEx and should arrive within 1 week.
Create Your Account

You’ll receive an email from Celestra Health with your account details. Follow those steps to set up your account.

  • If you don’t see an email from Celestra Health in your inbox, please check your spam or junk folder.
Download the App
After creating your account, you’ll be directed to a landing page with links to the App Store or Google Play. Use the link to download the correct version of the app for your device.
For illustrative purposes only, your insoles may look different
Log In
Open the app and log in using the email address and password you used when creating your account.
Enable Permissions
  • For iOS users: Enable Motion & Fitness and allow access to Apple Health.
  • For Android users: Enable Activity Recognition permissions.
Connect Your Insoles
Turn on Bluetooth, and follow the app's instructions to connect your smart insoles.
Enable Notifications
Enable push notifications to stay updated on reminders and activity progress.
For illustrative purposes only, your insoles may look different
Start Walking Sessions
When you’re ready to perform a walking session, tap ‘Start’ on the Ad Hoc Walking task card in the app.
Smart insoles are designed to fit comfortably into any pair of closed shoes
Need Help?
Should you need to contact Celestra Health support for any reason, you can submit a ticket through the Help section of the app by tapping the Submit A Ticket card and filling out the form. A Celestra Health representative will typically respond within one business day.
A fully charged device (smartphone, tablet, or laptop) with a working camera, microphone, and stable internet connection.
A quiet, well-lit space that is free from distractions.
Good lighting so your face is clearly visible; having a small flashlight or your phone’s flashlight nearby can help with skin, scalp, or joint checks.
Flexible device positioning so you can easily adjust or prop up your device hands-free if the research staff asks to view specific areas (such as your face, hands, or scalp).
Space to move in case you are briefly asked to stand or walk a few steps.
Your medication information, including your current steroid(s) and BENLYSTA® (belimumab) — either the medication bottles or a list with doses and schedule.
Time to focus without interruptions so the visit can be completed comfortably.
Before Your Video Call:
Schedule your visit
Use the scheduling link on your PicnicHealth Research Dashboard or the link sent to your email.
Tip: Search your inbox for “New task for the BEACON-SLE Study - schedule your remote visit” to find the scheduling email.
Check your confirmation
You’ll receive an email with your appointment time and instructions for joining the video call.
On the Day of Your Video Call:
Join the call
Click the Zoom link sent to you by email or text message, or use the link available on your research dashboard.
Meet with the research staff member
  • They will ask you structured questions about your health and any lupus symptoms you’ve experienced over the past 30 days.
  • If needed, they may guide you through a few simple visual checks (such as looking at your skin, hair, joints, or mouth). You can always tell them if you’re not comfortable with anything.
Receive Compensation
You’ll receive up to $60 for completing your visit.
See More

Related Articles

View All

Take control of your care.

Understand your health clearly. Walk into every appointment prepared.